https://butterfly.js.org/
安装主题
(使用 https://ghproxy.com/ 代理访问)
1
2
3
4
# 稳定版(推荐) git clone -b master https : # 测试版 git clone -b dev https :
安装主题相关插件
1
2
>npm install hexo-renderer-pug hexo-renderer-stylus --save
修改 Hexo 根目錄下的 _config.yml,把主題改為 butterfly
把主題目錄的 _config.yml 內容複製到 hexo 的根目錄并更名为_config.butterfly.yml 。( 注意: 複製的是主題的 _config.yml ,而不是 hexo 的 _config.yml)
1 >git clone -b main https://ghproxy.com/https://github.com/anzhiyu-c /hexo-theme-anzhiyu .git themes/anzhiyu
打开 Hexo 根目录下的 config.yml, 找到以下配置项,把主题改为anzhiyu。
1
2
3
4
# Extensions ## Plugins: https://hexo.io/plugins/ ## Themes: https://hexo.io/themes/ theme: anzhiyu
参考:https://blog.csdn.net/qq_43187818/article/details/104468721 https://www.cnblogs.com/lightbc/p/16845555.html
(仅_post 文件夹内的.md 文件有效,需启动 hexo s)
Hexo 默认的静态 url 格式是::year/:month/:day/:title,也就是按照年、月、日、文章标题来生成固定链接的。
http://id.github.io/2022/11/23/hello-world。
作用:使每篇文章都有一个唯一的编号进行区别(链接中不会出现中文,也不会因为修改文章的日期导致链接改变),每遍文章的访问方式如:
http://id.github.io/posts/38175.html。
安装插件:
1 >npm install hexo-abbrlink --save
打开Hexo目录下的 _config.yml 文件,修改 permalink: 配置项,且添加一个配置项 abbrlink:
1
2
3
4
5
6
7
8
9
10
11
12
13
14
15
16
permalink: posts/:abbrlink # 此处可以自己设置,也可以直接使用 /:abbrlink.html # abbrlink config abbrlink: alg: crc16 #算法:crc16(default) and crc32 rep: dec #进制:dec(default) and hex drafts: false #(true)Process draft,(false)Do not process draft. false(default) # Generate categories from directory-tree # depth: the max_depth of directory-tree you want to generate, should > 0 auto_category: enable: false #true(default) depth: #3(default) over_write: false auto_title: false #enable auto title, it can auto fill the title by path auto_date: false #enable auto date, it can auto fill the date by time today force: false # 启用强制模式,在此模式下,插件将忽略缓存,并计算每个帖子的缩写链接,即使它已经有了缩写链接。
运行方法:
启动hexo s => hexo n post postName1 =>创建postName1.md文件,并自动把 abbrlink 文档属性加入到文件中。如果abbrlink文档属性存在但不更新或 显示不正确 (abbrlink:‘0’) ,需删除此标签,等1秒,系统自动添加)。
扫描博客文章,根据“–config.ym"的配置从文章里获取内容生成一个xmlison文件的结果,搜索时就搜索这个文件的内容。
安装:
1 >npm install hexo-generator-searchdb --save
配置_config.yml 文件:
1
2
3
4
5
search: path: search.xml # 指定生成的搜索文件,可以生成xml和json两种格式。 field: post # 表示搜索的范围,有“post(所有文章)、page(所有顶部导航选项的页面)和a11(post+page)”三种值。 content: true #是否包含搜索到的文章的全部内容。false,生成的结果只包括标题和创建时间这些信息,没有文章主体。默认情况下是true. format: html #搜索到的内容、选项的格式。htmI(默认):将html原文本缩略;striptags:将html原文本缩略,并删除所有标记;raw:记下每一篇文章或每一页的文字。
使用插件:
1
2
3
4
5
6
7
8
9
10
11
12
13
# search (搜索) # see https://butterfly.js.org/posts/ceeb73f/#搜索系統 # -------------------------------------- # Local search local_search: enable: true # Preload the search data when the page loads. preload: false # Show top n results per article, show all results by setting to -1 top_n_per_article: 1 # Unescape html strings to the readable one. unescape: false CDN:
[!详细参考]https://blog.51cto.com/u_15477117/4919758
[!参考]https://butterfly.js.org/posts/507c070f/
安装:(直接写html代码,是不需要再安装插件,如下html示例)>npm install --save hexo-tag-aplayer
打开主题配置文件 _config.butterfly.yml ,添加内容: (添加全局 Aplayer 播放):
1
2
3
4
5
6
7
8
9
10
11
pjax: enable: true # 内嵌的音乐播放器 Inject the css and script (aplayer/meting) # 如果你想切换页面时,音乐不会中断。把主题配置文件 pjax 设为 true aplayerInject: enable: true # true开启,需通过VPN访问,才能正确显示。 per_page: true inject: bottom: - <div class="aplayer no-destroy" data-api="https://api.injahow.cn/meting/?server=:server&type=:type&id=:id&r=:r" data-id="60198" data-server="netease" data-type="playlist" data-fixed="true" data-autoplay="true"> </div>
api:metingJS 服务器(用于转换歌单),国外(默认): https://api.i-meto.com/meting/api ? 国内:https://api.injahow.cn/meting/ ? 参考MetingJS
[!介绍]
参考:https://github.com/CHENXCHEN/hexo-renderer-markdown-it-plus
安装: ^f2e3e6
1
2
npm un hexo-renderer-marked --save npm i hexo-renderer-markdown-it-plus --save
[!tip] 提示
hexo-renderer-marked 插件与 butterfly主题关联,卸载后 _config.butterfly.yml配置文件的 mathjax、katex 配置无效。
markdown-it-plus 插件使用 katex公式渲染,需要在 butterfly主题配置加载katex的css文件(不会加载其它js文件)。
配置 _config.butterfly.yml:
1
2
3
katex: enable: true # 只加载 Katex.min.css文件。 per_page: false # true,每页都加载;设置false ,只在有 katex: true 文档属性的页面加载css.
_config.yml配置(可选,不用配置此文件):
markdown-it-emoji
markdown-it-sub
markdown-it-sup
markdown-it-deflist
arkdown-it-abbr
markdown-it-footnote
markdown-it-ins
markdown-it-mark
@iktakahiro/markdown-it-katex
markdown-it-toc-and-anchor
关闭插件(可选):
1
2
3
4
5
6
7
8
9
10
11
12
13
markdown_it_plus: highlight: true html: true xhtmlOut: true breaks: true langPrefix: linkify: true typographer: quotes: “”‘’ plugins: - plugin: name: markdown-it-mark enable: false
乐谱标签:abcjs
参考:https://github.com/D0n9X1n/hexo-blog-encrypt/blob/master/ReadMe.zh.md
安装:
1 npm install --save hexo-blog-encrypt
用法:(文章信息头 > 按标签加密)
将 “password” 字段添加到您文章信息头就像这样.
1
2
3
4
5
--- title: Hello World date: 2016-03-30 21:18:02 password: hello ---
_config.yml全局标签配置
1
2
3
4
5
6
7
8
9
10
# Security encrypt: abstract: 有东西被加密了, 请输入密码查看. message: 您好, 这里需要密码. tags: - {name: tagName1, password: 密码A} - {name: tagName2, password: 密码B} wrong_pass_message: 抱歉, 这个密码看着不太对, 请再试试. wrong_hash_message: 抱歉, 这个文章不能被校验, 不过您还是能看看解密后的内容. # Theme: blink # 密码框样式(可选,推荐默认)
安装插件后,支持 mermaid 代码块。
安装:npm install --save hexo-filter-mermaid-diagrams
配置_config.butterfly.yml:
1
2
3
4
5
6
7
8
9
# mermaid # 使用mermaid标签可以绘制Flowchart(流程图)、Sequence diagram(时序图 )、Class Diagram(类别图)、State Diagram(状态图)、Gantt(甘特图)和Pie Chart(圆形图)。 # see https://github.com/mermaid-js/mermaid mermaid: enable: true # built-in themes: default/forest/dark/neutral theme: light: default dark: dark
示例:
flowchart LR
A[Hard] -->|Text| B(Round)
B --> C{Decision}
C -->|One| D[Result 1]
C -->|Two| E[Result 2]
代码:
1
2
3
4
5
6
7
8
9
10
11
<pre class="mermaid">flowchart LR A[Hard] -->|Text| B(Round) B --> C{Decision} C -->|One| D[Result 1] C -->|Two| E[Result 2]</pre> 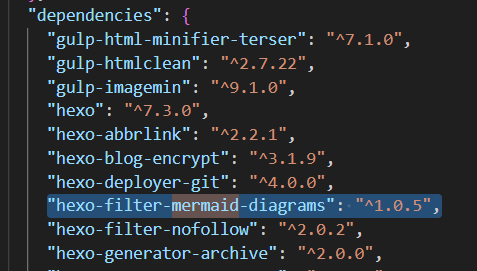 ## ~~10.压缩文件(glup)~~,暂时无效 全局安装gup工具:
npm install gulp -g
1
2
3
4
5
6
7
8
9
10
11
12
13
14
给博客可选的安装插件: - gulp-htmlclean:清理html (建议) - gulp-html-minifier-terser:压缩html (建议) - gulp-imagemin:压缩图片(建议) - gulp-minify-css:压缩css - gulp-uglify:混淆js 示例,hexo目录安装: `npm install gulp-htmlclean gulp-htmlmin gulp-imagemin --save` 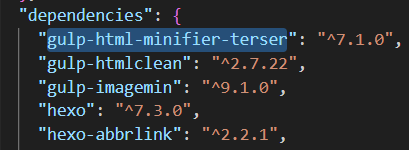 添加gulpfile.js文件: ![[gulpfile.js]] 运行: ```powershell gulp // 或 hexo g && gulp &&hexo d